About Anodizing

Important Information and Tips Before Anodizing

The best alloy for anodizing and most common are 6061, 6082, 6063 aluminum. Titanium and magnesium can also be anodized however here at Island anodizing we only anodize aluminum and titanium. 

The final anodized surface appearance depends on mechanical finishing of the basis metal before the parts are submitted for anodizing treatment. 

Anodizing will not cover up pre-existing defects in the material surface such as scratches, embedded debris or marks introduced during the extrusion, rolling or machining of the base material.  Depending on the desired appearance any imperfections need to be removed by mechanical means such as polishing, linishing or abrasive blasting.

The surface roughness will affect the visual properties of the final part, whether it appears dull or shiny. To have a shiny finish the part must have a highly polished surface prior to anodizing. 

Oxidation may occur when unprotected and raw aluminum is exposed to water and air, this oxidation is uneven which can make it challenging to provide a good result after the anodizing process.  Other possible causes that can cause corrosion on raw aluminum are certain types of cleaners like acids, ammonia, lye or alkaline.  It is recommended to use mild detergent or soap, acetone or alcohol to clean parts before sending. 

When sending parts for anodizing please ensure all parts are well packaged to avoid any damage such as dents and scratches during shipping.  If any parts arrive damaged we will contact you immediately.  

It is important not to leave any fingerprints when handling untreated parts with bare hands.  If not removed the fingerprints will be permanently imprinted on the surface of the metal when anodized. It is recommended to use nitrile gloves when handling raw aluminum.  

Please note, any parts that have been polished with a buffing compound,  the chemicals we use may not be able to clean the compound off well enough before anodizing and it may affect the finish.

Any dirt or oil left on the parts can be a challenge to clean with our process, extra charges may apply if we have to clean any parts  before processing. 

Parts to be anodized must not have any steel pins, inserts, coils or rivets attached and must be removed. . Only aluminum and its alloys can be anodized, any other metals such as steel, stainless steel, brass etc. will be destroyed in the process.  

It is important any anodized parts do not get cross contaminated when belt sanding or tumbling media should not be used for both steel and aluminum. Small steel particles can be left behind and embedded in the aluminum substrate which might not be detected by the naked eye before anodizing.  If left on it will cause small little pits on the aluminum surface after anodizing.

Parts welded before anodizing will show a surface and colour variation on your finished products. TIG welding and a 5356 welding rods usually result in a better anodizing outcome, unlike MIG welding because of the way it heats and cools does not anodize properly or take colour dye. 

It should be noted that colour matching through the anodizing dying process is not as consistent as colours obtained through powder coating or paint.  There are no pantone matched colours in commercial anodizing due to the variables in the anodizing process. We recommend when choosing colours to accept a colour range of light, medium, or dark before anodizing your parts. We will work with you to reach your desired colour match. 

Rack marks, during the anodizing process parts are dipped in an electrolytic bath which involves running an electric current through the aluminum parts. To successfully attain the coating all parts must be gripped by titanium or aluminum racks. Due to this process some contact points may leave rack marks on parts, these marks will not be anodized and will be visible. 

The anodizing process

Using a multi step process, aluminum is submerged into an electrolyte bath along with a cathode, a current is passed through the medium, the reaction of the oxygen with the surface of the aluminum creates an anodic layer.

1. Pretreatment

Critical to the process, pretreating cleans all grease, oil, dirts and natural oxides off the aluminum surface to prepare the product for consistent anodizing.

2. Etching

Using a sodium hydroxide solution removes the natural oxides off of the aluminum surface to prepare for the anodized finish. The amount of soak time determines the finish, short soaks produce a glossy finish while longer soaks give a matte finish.

3. Desmutting

Removes the residue known as smut, an insoluble alloy residual, off of the etched aluminum part.

4. Anodizing

Using an electrochemical process the aluminum part is submerged into an acid electrolyte bath while passing an electric current through the bath. The aluminum acts as an anode so that oxygen ions are released which allows for a controlled oxidation process. Thickness and the density of the anodic coating depend on the current density, time, temperature and concentration of the electrolyte during anodizing. Through this process, the oxide layer grows from nanometers to microns in thickness.
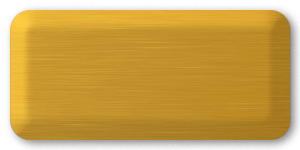
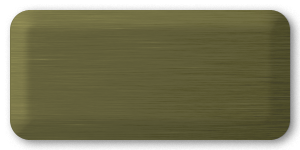
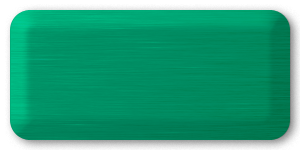
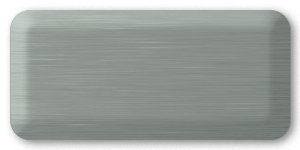
5. Colouring

At this stage the aluminum is very porous and sensitive to absorbing colour pigments. Immersing the part in a concentrated dye bath the porous anodic coating absorbs the dye. The intensity of the colour is determined by the thickness of the anodic film, the dye concentration, immersion time and temperature.

6. Sealing

The most important step of the process, using a mid temperature seal prevents dyes from leaching and prevention of sealing smut.  This method requires less time to seal with lower temperatures and provides a consistent colour opposed to a hot water seal which takes higher temperatures.

PROUD MEMBERS OF
Aluminum Anodizing Council Member
Canadian Association of Defense and Security Industries
Aerospace Industries Association of Canada